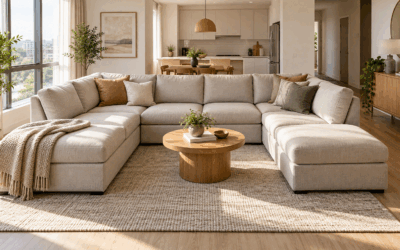
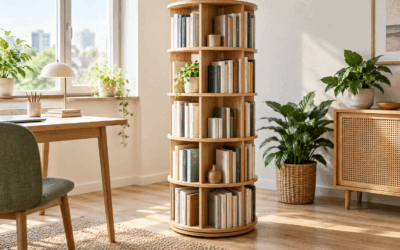
To measure a room for furniture, record the usable wall width, floor depth, and available height; then mark every door swing, window, baseboard, vent, radiator, outlet, and permanent obstruction. Next, measure the exact furniture in its closed and fully used positions. Finally, measure the complete delivery route from the outside door to the final location.
The important distinction is between a piece merely fitting on the floor and fitting in real life. A cabinet needs room for its doors, a dining chair needs room to pull back, and a sleeper sofa needs its open-bed depth. This guide provides a repeatable measurement order so those moving parts do not become expensive surprises.
Enter them in the free Furniture Fit Calculator to compare the room, operating clearance, and delivery opening.
Tools you need
Use a rigid tape measure or laser measure, a pencil, paper, removable painter’s tape, and a phone for reference photos. A small level is useful when floors, walls, or ceilings may not be square. If another person is available, ask them to hold the tape at corners so it stays straight rather than following the floor or sagging through the air.
- Tape or laser measure: use one unit throughout the project.
- Paper and pencil: sketch first; neatness is less important than labels.
- Painter’s tape: mark the footprint and open position on the floor.
- Phone camera: photograph labels, obstacles, and tight delivery turns.
- Product specification page: record the exact size or variant, not the family name.
Write every number immediately and include the unit after it. Notes such as “84” without “in” or “cm” are easy to misread later, particularly when a product listing uses a different unit.
Products worth checking
Both products below are laser distance measures for the measuring step. The specs come from the Amazon listings we read on October 17, 2026. We have not tested either unit. Check the current price on Amazon before you buy.
1. Bosch GLM100-23 100 ft Blaze Laser Distance Measure
Specs (from the listing, checked 2026-10-17): measures up to 100 ft to within 1/16 in; Class II laser (635 nm, under 1 mW); backlit display; rounding from 1/2 in down to 1/32 in; 2 AA batteries included; item weight 86 g.
Best for: readers who want a pocket-size laser for long wall-to-wall distances and a backlit reading. Skip if: you want app or data-memory features; the listing does not mention either, and it does not state the unit’s dimensions.
View on Amazon (affiliate link)
2. Klein Tools 93LDM100C Compact Laser Distance Measure, 100-Foot
Specs (from the listing, checked 2026-10-17): measures 2 in to 100 ft; accuracy +/- 1/16 in for the first 30 ft and +/- 1/8 in up to 100 ft; Class 2, 1 mW laser; reverse-contrast LCD; keeps the last two readings on screen; pocket clip; 2 AAA batteries included; item weight 65 g.
Best for: readers who want a compact laser with accuracy stated for each distance band and a one-button layout. Skip if: you need a longer range or a Bluetooth option; the listing does not mention either.
View on Amazon (affiliate link)
Step 1: measure the usable room
Draw the room shape
Start with a simple overhead sketch. Draw each wall as a separate line and label it clockwise. Do not assume opposite walls have identical lengths. Older rooms, alcoves, bay windows, chimney breasts, and boxed-in pipes can make the usable floor shape smaller than the advertised room dimensions.
Measure wall to wall close to floor level, then repeat at the height where the furniture will be widest. A baseboard may reduce floor-level width while a windowsill or wall trim reduces width higher up. For tall furniture, record the lowest ceiling point, soffit, light fixture, and sloped section above the proposed location.
Record fixed obstacles
Add doors, windows, columns, radiators, vents, outlets, switches, thermostats, and built-ins to the sketch. For a hinged door, measure from the hinge to the outer edge and draw the complete swing arc. For a sliding or pocket door, record the clear opening when fully open. Note how far handles, stops, and trim project into that opening.
Measure the wall segment that is actually usable rather than subtracting obstacles later from memory. For example, a 12-foot wall containing a 36-inch doorway is not automatically a 9-foot furniture wall: casing, switches, door swing, and access beside the door may reduce it further.
Separate width, depth, and height
Choose an orientation and keep it consistent. On the sketch, width runs along the wall, depth projects into the room, and height runs upward. Product listings do not always present dimensions in that order, so copy the labels as well as the numbers. Never assume the longest number is width.
Step 2: measure the exact furniture
Use the dimensions for the exact selected size, color, module, or configuration. A sectional may change overall width when the chaise moves sides. A dining table may list closed length while the photo shows the leaf installed. A bed listing may describe the mattress size rather than the outside frame.
- Overall width: include arms, trim, overhanging tops, and projecting hardware.
- Closed depth: measure from the farthest back point to the farthest front point.
- Overall height: include feet, headboards, finials, and raised backs.
- Open or operating depth: include drawers, cabinet doors, recline, table leaves, and bed extensions.
- Human-use space: include room to sit, stand, pull a chair back, or walk past.
Measure removable parts separately. Legs, cushions, shelves, doors, and modular sections may reduce the delivery size, but only rely on removal when the manufacturer permits it and the item can be reassembled correctly. Ask the seller for carton measurements when possible because assembled dimensions and shipping dimensions serve different checks.
Step 3: measure the entire delivery route
Walk backward from the final furniture position to the delivery entrance. At every doorway, hall, elevator, stair, landing, and turn, record the clear width, clear height, and available turning depth. Measure the space with doors and gates in the position they will use during delivery.
The narrowest opening is not always the limiting point. A package can pass through a door and still fail at the wall immediately behind it because there is not enough depth to rotate. Stairs also require headroom above the package and space around handrails, newel posts, ceiling drops, and landings.
A rectangular item can sometimes be tilted or rotated through an opening, but a simple width-versus-door comparison cannot guarantee the maneuver. Soft furniture may compress and removable legs may help, while rigid cabinets and stone tops do not behave the same way. If you are moving a couch, use our sofa doorway fit guide. For a difficult route, give the delivery team photos and measurements before the order becomes nonreturnable.
Step 4: draw a scaled floor plan
A scale drawing makes multiple pieces easier to compare. On graph paper, choose a scale such as one square representing 6 inches. Divide every room and furniture measurement by 6, then draw the room and cut out movable furniture rectangles at the same scale. If you work in centimeters, one square can represent 10 or 20 centimeters.
Draw two outlines for furniture that moves: a solid line for the closed footprint and a dashed line for the full use zone. Open every real door and drawer while assessing the plan. Mark permanent walking paths separately so a layout does not depend on squeezing past furniture sideways.
Use painter’s tape before ordering
Transfer the preferred layout to the floor with removable painter’s tape. Mark the furniture corners, then mark its opened or reclined position with a second outline. Place a box or chair at the approximate height if the piece may block a window, sightline, outlet, or wall control. Live with the outline for a day and walk the normal routes while carrying laundry, groceries, or anything else commonly moved through the space.
Worked measurement example
Suppose a room measures 120 inches wide by 144 inches deep with a 96-inch ceiling. A sofa is 72 inches wide, 34 inches deep, and 34 inches high. You choose 12 inches of clearance on each side and want a 30-inch clear zone in front.
| Check | Calculation | Result |
|---|---|---|
| Required width | 72 + 12 + 12 | 96 in |
| Width remaining | 120 − 96 | 24 in |
| Required depth | 34 + 30 | 64 in |
| Depth remaining | 144 − 64 | 80 in |
The arithmetic says this use zone fits inside the room rectangle. It does not yet prove that the sofa clears the door, avoids the radiator, works with other furniture, or provides an appropriate route. Those items must be placed on the plan and checked separately. Use the calculator to repeat this comparison with your own measurements.
Common measuring mistakes
Measuring only the empty wall
A piece can fit along a wall but project too far into the room. Record both the wall width and the usable floor depth, then include the open position and the route around it.
Using nominal sizes
Names such as queen, three-seat, 60-inch, or four-person are categories, not reliable outside dimensions. Use the exact assembled measurements for the selected product and verify conflicting listing fields before purchase.
Forgetting trim and hardware
Baseboards, door casing, handles, hinges, plugs, cable bends, and floor vents occupy real space. Measure between the nearest projecting points instead of between painted wall surfaces when those projections cannot be removed.
Checking only the final room
Measure the outside entrance, shared hallway, elevator, stairs, and every turn. Apartment and condominium routes may include building rules, elevator reservations, or protective requirements that measurements alone cannot answer.
Treating a planning clearance as a universal rule
Comfort, accessibility, fire egress, workplace setup, and local code are different questions. Use manufacturer instructions and applicable requirements for the situation. For tall storage furniture, follow the supplied anchoring instructions; the U.S. Consumer Product Safety Commission’s Anchor It guidance explains the tip-over hazard and recommends anchoring furniture to the wall.
Room measurement checklist
- ☐ Every wall length and usable wall segment
- ☐ Room depth and lowest available height
- ☐ Door locations, clear openings, and swing arcs
- ☐ Windows, sills, radiators, vents, outlets, and switches
- ☐ Exact assembled furniture width, depth, and height
- ☐ Fully open or operating dimensions
- ☐ Desired side, front, back, and overhead clearance
- ☐ Package dimensions and removable parts
- ☐ Every doorway, hallway, elevator, stair, landing, and turn
- ☐ Painter’s-tape test of the footprint and use zone
Frequently asked questions
Should I measure the room or the furniture first?
Measure the room and delivery route first so you know the limits. Then record the exact dimensions of each furniture option and compare like-for-like axes.
Do furniture dimensions include legs and handles?
They should describe the overall assembled item, but listings vary. Check the diagram or ask the seller whether projecting legs, arms, handles, and trim are included.
How do I measure furniture that opens?
Record both the closed footprint and the farthest fully open position. Add the space a person needs to operate it beyond the opened edge.
Can I tell if a sofa will fit through a door from width alone?
No. Measure the sofa or package in three dimensions, the clear opening in two dimensions, and the turning space and ceiling height around the doorway.
How accurate should room measurements be?
Measure to the smallest practical increment your tool can reproduce, record the unit, and measure critical spans twice. Do not round a tight fit upward.
Turn the measurements into a buying decision
Keep the room sketch, delivery-route notes, and product specification page together. Compare the room and furniture in the same units, verify the open position, and confirm the delivery package before paying. When the numbers are ready, run them through the Furniture Fit Calculator and print the result for your shopping notes.
Last reviewed October 6, 2026. This guide is for planning and does not guarantee delivery, installation, safety, accessibility, or code compliance.